Deploy Windows Core Server 2022 with Server Core App Compatibility Feature on Demand with Packer

I while ago I started with parker to create simple templates for use in my homelab.

It take some time to find the rights scripts and learning en understanding the HCL2 coding

But in related to Security reasons I want to use a Windows Core Server the smaller footprint.

What is Server Core App Compatibility Feature on Demand: https://learn.microsoft.com/en-us/windows-server/get-started/server-core-app-compatibility-feature-on-demand

Installing Features on Demand through Powerschell contains a bug. You may see “failure to download files”, “cannot download”, or errors like “0x800F0954” or file not found.

To Solve that I created I powerschell script to run the install twice: featuresondemand.ps1

You can find al the needed files on my Public Github Packer repository: https://github.com/WardVissers/Packer-Public

When running is showing like this:

A blue screen with white squares

Description automatically generated

It works for now, but there is one thing that would the hole thing a quiet nicer.
Passwords encrypted in a separate file.

VCF 5.0 running inside Nested ESXi server with only 64GB Memory

So I interested to trying to deploy latest release of VMware Cloud Foundation (VCF) 5.0 on my Windows 11 Home PC witch have 128GB and 16 core intel cpu.

William Lee wrote a nice artikel about VMware Cloud Foundation 5.0 running on Intel NUC

Disclaimer: This is not officially supported by VMware, please use at your own risk.

Requirements:

  • VMware Cloud Builder 5.0 OVA (Build 21822418)
  • VCF 5.0 Licenses Through VMUG ADVANTAGE
  • Home PC (Not Special Hardware)
    – 128GB Memory
    – Intel 12600 CPU
    – 4TB of NVME Storage
  • Windows 11 with VMware Workstation 17

Setup

Virtual Machines

  • DC02 (Domain Controller, DNS Server) (4GB 2vcpu)
  • VCF-M01-ESX01 (ESXi 8.0 Update 1a) (64GBGB 1x140GB 2x600NVME 2x NIC) (Every Thin Provisiond)
  • VCF-M01-CB01 (4GB and 4CPU) Only needed through First Deploment

Network settings on my PC

  • 1 IP In my home network
  • 172.16.12.1 (To Fool Cloudbuilder)
  • 172.16.13.1 (To Fool Cloudbuilder)

Procedure:

Install en Configure ESXi

Step 1 – Boot up the ESXi installer from de iso mount and then perform a standard ESXi installation.

Step 2 – Once ESXi is up and running, you will need to minimally configure networking along with an FQDN (ensure proper DNS resolution), NTP and specify which SSD should be used for the vSAN capacity drive. You can use the DCUI to setup the initial networking but recommend switching to ESXi Shell afterwards and finish the require preparations steps as demonstrated in the following ESXCLI commands:

esxcli system ntp set -e true -s pool.ntp.org
esxcli system hostname set –fqdn vcf-m01-esx01.wardvissers.nl

Note: Use vdq -q command to query for the available disks for use with vSAN and ensure there are no partitions residing on the 600GB disks.
Don’t change time server pool.ntp.org.

To ensure that the self-signed TLS certificate that ESXi generates matches that of the FQDN that you had configured, we will need to regenerate the certificate and restart hostd for the changes to go into effect by running the following commands within ESXi Shell:

/bin/generate-certificates
/etc/init.d/hostd restart

Cloudbuilder Config

Step 3 – Deploy the VMware Cloud builder in a separate environment and wait for it to be accessible over the browser. Once CB is online, download the setup_vmware_cloud_builder_for_one_node_management_domain.sh setup script and transfer that to the CB system using the admin user account (root is disabled by default).

Step 4 – Switch to the root user and set the script to have the executable permission and run the script as shown below

su –
chmod +x setup_vmware_cloud_builder_for_one_node_management_domain.sh
./setup_vmware_cloud_builder_for_one_node_management_domain.sh

The script will take some time, especially as it converts the NSX OVA->OVF->OVA and if everything was configured successfully, you should see the same output as the screenshot above.

A screenshot of a computer

Description automatically generated

Step 4 – Download the example JSON deployment file vcf50-management-domain-example.json and and adjust the values based on your environment. In addition to changing the hostname/IP Addresses you will also need to replace all the FILL_ME_IN_VCF_*_LICENSE_KEY with valid VCF 5.0 license keys.

Step 5 – The VMnic in the Cloud Builder VM will acked als a 10GB NIC so I started the deployment not through powershell but normal way in Cloud Builder GUI.

Your deployment time will vary based on your physical resources but it should eventually complete with everything show success as shown in the screenshot below. (I have one retry for finish)
A screenshot of a computer

Description automatically generated A screenshot of a cloud support

Description automatically generated
Here are some screenshots VCF 5.0 deployment running on my home PC.

A screenshot of a computer

Description automatically generated

A screenshot of a computer

Description automatically generated

Problems

Check this if you have problems logging in NSX:
https://www.wardvissers.nl/2023/07/26/nsx-endless-spinning-blue-cirle-after-login/

Next Steps.

1. Reploy with use of the Holo-Router https://core.vmware.com/resource/holo-toolkit-20-deploy-router#deploy-holo-router

2. Testing if can deploy Single Host VCF Workload Domain, on same way by following this blog post HERE! 😁
A screenshot of a computer

Description automatically generated

If I can start another 64GB ESXi Server.

NSX endless spinning blue cirle after login

After Upgrading NSX in my Homelab from from 3.2.0.1 to 4.0.1.1 I had weird issue. Also when I deployed my VCF5 lab
When I log in the NSX manager I had endless spinning blue circle
Tried different browsers Chrome/Firefox.

A blue and white circle

Description automatically generated

Solution: Setting the Browser back to English.. Works

Chrome.

A screenshot of a computer

Description automatically generated

And it works again

A screen shot of a computer

Description automatically generated

Source: Link

VMware Cloud Foundation 5.0 is Here

The VMware Cloud Foundation team is pleased to announce the availability of VMware Cloud Foundation 5.0

Waiting for VMUG Advantive to be updatet & Finding the time to test it out.

Powercli Delete Orphaned Edge Transport Nodes

I made a little mistake on my Lab Environment. There fore it was required to clean up my last unremoveable edge server.

Sow i made a little powercli script

RemoveOrphanedEdge.ps1

# https://kb.vmware.com/s/article/892835
# https://virtuallyjason.blogspot.com/2020/11/using-nsx-t-api.html

$nsxfqdn = Read-Host “Give the IP of the FQDN from your NSX Server”
if (!($creds)){

$creds = Get-Credential -Message "NSX-T Administrative Credentials:"

}
$base64Creds = [Convert]::toBase64String([System.Text.Encoding]::UTF8.GetBytes(“$($creds.username):$($creds.GetNetworkCredential().password)”))
$header = @{Authorization = “Basic $base64Creds”}
$uri = “https://$nsxserver”

# Check API Connection

invoke-webrequest -uri “$uri/api/v1/spec/openapi/nsx_api.json” -headers $header -SkipCertificateCheck

# Clean Stale Entries

invoke-webrequest -uri “$uri/api/v1/transport-nodes?action=clean_stale_entries” -headers $header -Method ‘POST’ -SkipCertificateCheck

Enable Virtualization-based Security on a Virtual Machine on Nested ESXi Server in VMware Workstation

First Step Shutdown ESXi Server enable Encryption
Graphical user interface, application

Description automatically generated

Second Add vTPM

Graphical user interface, application, Word

Description automatically generated

Boot ESXi Server(s)

Configure Key Providers (Add Native Key Provider)

Graphical user interface, text, application, website

Description automatically generated

A screenshot of a computer

Description automatically generated

Now you can add vTPM to you VM
Don’t forget to enable VBS

Graphical user interface, application

Description automatically generated

Create GPO SRV 2022 – Virtualization Based Security and I did Apply only to my Server 2022 Lab Environment
Graphical user interface, application

Description automatically generated

System Information on my Server 2022 Lab Server
A screenshot of a computer

Description automatically generated with medium confidence

Virtual Machine with Windows Server 2022 with KB5022842 (Feb 2023) installed and configured with secure boot will not boot up on vSphere 7 unless updated to 7.0u3k (vSphere 8 not affected)

Virtual Machine with Windows Server 2022 with KB5022842 (Feb 2023) installed en configured with secure boot enabled will not boot up on vSphere 7 unless updated to 7.0u3k (vSphere 8 not affected)

VMware Seciroty Violation message

In VM vmware.log, there is ‘Image DENIED’ info like the below:
2023-02-15T05:34:31.379Z In(05) vcpu-0 – SECUREBOOT: Signature: 0 in db, 0 in dbx, 1 unrecognized, 0 unsupported alg.
2023-02-15T05:34:31.379Z In(05) vcpu-0 – Hash: 0 in db, 0 in dbx.
2023-02-15T05:34:31.379Z In(05) vcpu-0 – SECUREBOOT: Image DENIED.

To identify the location of vmware.log files:

  1. Establish an SSH session to your host. For ESXi hosts
  2. Log in to the ESXi Host CLI using root account.
  3. To list the locations of the configuration files for the virtual machines registered on the host, run the below command:

#vim-cmd vmsvc/getallvms | grep -i “VM_Name

  1. The vmware.log file is located in virtual machine folder along with the vmx file.
  2. Record the location of the .vmx configuration file for the virtual machine you are troubleshooting. For example:

/vmfs/volumes/xxxxxxxx-xxxxxxx-c1d2-111122223333/vm1/vm1.vmx
/vmfs/volumes/xxxxxxxx-xxxxxxx-c1d2-111122223333/vm1/vmware.log

Resolution

This issue is resolved in VMware ESXi 7.0 U3k, released on February 21st 2023. Build 21313628
A screenshot of a computer

Description automatically generated with medium confidence
Notes:

  • Virtual machines running on any version of vSphere ESXi 8.0.x are not impacted by this issue
  • vSphere ESXi 6.7 is End of general Support. For more information, see The End of General Support for vSphere 6.5 and vSphere 6.7 is October 15, 2022.
  • If you already face the issue, after patching the host to ESXi 7.0 Update 3k, just power on the affected Windows Server 2022 VMs. After you patch a host to ESXi 7.0 Update 3k, you can migrate a running Windows Server 2022 VM from a host of version earlier than ESXi 7.0 Update 3k, install KB5022842, and the VM boots properly without any additional steps required.

NSX-T 3.1 Home lab – Part 2

With all the Fabric configuration done we can test our setup.

I’m creating two overlay segments in NSX connected to a Tier-1 gateway, and after that we’ll create a Tier-0 gateway and connect the T1 gateway to it to get North/South connectivity to the overlay resources

Two VMs will be deployed, one VM in each of the two overlay segments

Create a Tier-1 Gateway

The Tier-1 Gateway will initially not be connected to a Tier-0 Gateway (I haven’t configured a T0 gw yet) or an Edge Cluster.

Tier-1 Gateway

Tier-1 Gateway

Create Logical segments

We need two logical segments, both using the Overlay Transport Zone. I’m defining different subnets on them, 10.0.1.0/24 and 10.0.2.0/24.

Afbeelding met tekst, monitor, schermafbeelding, televisie

Automatisch gegenereerde beschrijving

Segments

Add VMs to Logical segments

We have two Photon VMs which should be added to the logical segments.

Two Photon VMs

Test connectivity

Afbeelding met tekst

Automatisch gegenereerde beschrijving Afbeelding met tekst

Automatisch gegenereerde beschrijving

Now let’s verify that the two VMs can ping each other

Afbeelding met tekst

Automatisch gegenereerde beschrijving

Don’t forget to enable the echo rule on the Windows Firewall….

Connectivity test

This shows that the overlay is working, and note again that the Edge VMs are not in use here.

External connectivity

Traffic is flowing between VMs running on Logical segments inside the NSX-T environment, but what if we want to reach something outside, or reach a VM inside a NSX-T overlay?

Then we need to bring a Tier-0 Gateway in to the mix.

The T-0 gateway can be configured with Uplinks that are connected to the physical network. This is done through a segment which can reach the physical network, normally through a VLAN.

To configure the uplink interfaces we need to have Edge VMs so finally we get to bring those into play as well.

Create segment for uplinks

First I’ll create a segment mapped to VLAN 99 in my lab. Note that I select the VLAN transport zone, and I do not connect the segment to a gateway

Create Uplink VLAN segment

Create Uplink VLAN segment

Create Tier-0 gateway

Now we’ll create a Tier-0 gateway, note that I now also select my Edge cluster.

Afbeelding met tekst, schermafbeelding, monitor

Automatisch gegenereerde beschrijving

Create T0 gateway

Static route

To be able to forward traffic out of the NSX-T environment the T0 gateway needs to know where to send queries for IPs it doesn’t control. Normally you would want to configure a routing protocol like BGP or OSPF so that the T0 gateway could exchange routes with the physical router(s) in your network.

I’ve not set up BGP or any other routing protocol on my physical router, so I’ve just configured a default static route that forwards to my physical router. The next hop is set to the gateway address for the Uplink VLAN 99, 192.168.99.1

Static route

Static route

Link T1 gateway to T0 gateway

We’ve done a lot of configuring now, but still we’ve not got connectivity in or out for our VMs. The final step is to connect the Tier-1 gateway to the Tier-0 gateway, and we’ll also activate Route Advertisement of Connected Segments and Service Ports

Afbeelding met tekst, schermafbeelding, monitor, zwart

Automatisch gegenereerde beschrijving

Tier-1 Gateway

Test connectivity

Afbeelding met tekst

Automatisch gegenereerde beschrijving

Verify North/South connectivity

Yes!

Test Distributed Firewall

Let’s also do a quick test of the Distributed Firewall feature in NSX-T.

First we’ll create a rule blocking ICMP (ping) from any to my test vm and publish the rule

Afbeelding met tekst, schermafbeelding, monitor, binnen

Automatisch gegenereerde beschrijving ICMP firewall rule

ICMP firewall rule

Now let’s test pinging from from my pc to nested Windows 2016 server. With the rule not enabled en enabled.

Afbeelding met tekst

Automatisch gegenereerde beschrijving

Ping blocked

Summary

Hopefully this post can help someone, if not it has at least helped me.

Now we have working environment so we can go testing some things.
Also scripting/automation against a nsx environment I will look in to!

Building NSX-T 3.1 Home lab Step 1

I’m doing a mini-series on my NSX-T home lab setup. It’s only for testing en knowledge about NXS-T.

With newer versions of NSX-T 3.1 and later a couple of enhancements have been made that makes the setup a lot easier, like the move to a single N-VDS with the ability to run NSX on a Virtual Distributed Switch (VDS) in vCenter with VDS version 7.0.

In NSX-T 3.11 we got the ability to have the Edge TEP on the same subnet as the hypervisor TEP. A nice write-up of this feature can be found here: https://www.virten.net/2020/11/nsx-t-3-1-enhancement-shared-esxi-and-edge-transport-vlan-with-a-single-uplink/

Lab environment

First let’s have a quick look at the lab environment:

Compute

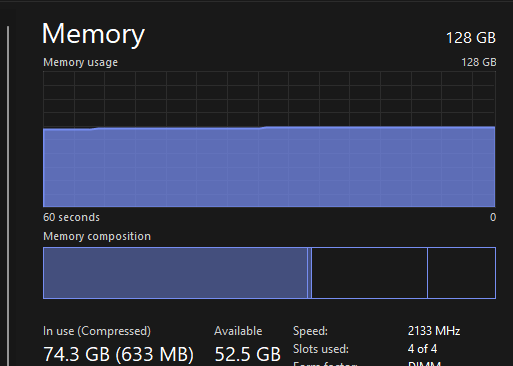
I have 1 have one ESXi Server Dell Server R730. I use only one nic for Management en Virtual Machine Traffic.

Network

My home network consists of single VLAN

VLAN

Subnet

Role

Virtual Switch

0

192.168.150.0/24

Management/Virtual Machine Traffic

vSwitch0

 Also ensure you enable the required security settings to support nested virtualization:

Virtual Machines

I run a virtualized vSphere 7 Cluster on my host

Afbeelding met tekst

Automatisch gegenereerde beschrijving

The Distributed Virtual Switches are running version 7.0.0 which let’s us deploy NSX-T on the VDS directly.

Afbeelding met tekst

Automatisch gegenereerde beschrijving

Afbeelding met tafel

Automatisch gegenereerde beschrijving

Preparations

Check out the NSX-T Data Center Workflow for vSphere for details and documentation on the process

IP Addresses and DNS records

Before deploying NSX-T in the environment I’ve prepared a few IP addresses and DNS records

Role

IP

NSX Manager

192.168.150.229

NSX-T Edge node 1

192.168.150.227

NSX-T Edge node 2 (currently not in use)

192.168.150.228

NSX-T T0 GW Interface 1

192.168.99.2

Note that I’ve reserved addresses for a second Edge which I’m not going to use at the moment.

Deploy NSX manager appliance

VMware documentation reference

The NSX manager appliance has been downloaded and imported the OVF to the cluster. I won’t go into details about this, I just followed the deployment wizard.

In my lab I’ve selected to deploy a small appliance which requires 4 vCPUs, 16 GB RAM and 300 GB disk space. For more details about the NSX Manager requirements look at the official documentation

Note that I’ll not be deploying a NSX Manager cluster in my setup. In a production environment you should naturally follow best practices and configure a cluster of NSX Managers

NSX-T deployment

Now let’s get rocking with our NSX-T setup!

We’ll start the NSX manager and prepare it for configuring NSX in the environment

Initial Manager config

After first login I’ll accept the EULA and optionally enable the CEIP

License

Next I’ll add the license.

Add license

Import certificate

Imported certificates

IP Pools

Our Endpoints will need IP addresses and I’ve set aside a subnet for this as mentioned. In NSX Manager we’ll add an IP pool with addresses from this subnet. (The IP pool I’m using is probably way larger than needed in a lab setup like this)

Afbeelding met tekst, schermafbeelding, monitor

Automatisch gegenereerde beschrijving

TEP pool

Compute Manager

With all that sorted we’ll connect the NSX manager to our vCenter server so we can configure our ESXi hosts and deploy our edge nodes.

Best is a specific service account for the connection

Afbeelding met tekst, monitor, schermafbeelding, scherm

Automatisch gegenereerde beschrijving

Compute Manager added

Fabric configuration

Now we’re ready for building out our network fabric which will consist of the following:

Transport Zones

Overlay

VLAN

Transport Nodes

ESXi Hosts

Edge VMs

Edge clusters

Take a look at this summary of the Key concepts in NSX-T to learn more about them.

Transport Zone

The first thing we’ll create are the Transport Zones. These will be used later on multiple occasions later on. A Transport Zone is used as a collection of hypervisor hosts that makes up the span of logical switches.

The defaults could be used, but I like to create my own.

Afbeelding met tekst, monitor, schermafbeelding, scherm

Automatisch gegenereerde beschrijving

Transport Zones

Uplink Profiles

Uplink profiles will be used when we configure our Transport Nodes, both Hosts and Edge VMs. The profile defines how a Host Transport node (hypervisor) or an Edge Transport node (VM) will connect to the physical network.

Again I’m creating my own profile and leave the default profiles be as they are.

Afbeelding met tekst, monitor, zwart, schermafbeelding

Automatisch gegenereerde beschrijving

Uplink profile

In my environment I have only one Uplink to use. Note that I’ve set the Transport VLAN to 0 which also corresponds with the TEP VLAN mentioned previously.

Transport Node Profile

Although not strictly needed, I’m creating a Transport Node profile which will let me configure an entire cluster of hosts with the same settings instead of having to configure each and every host

In the Transport Node profile we first select the type of Host switch. In my case I’m selecting the VDS option, which will let me select a specific switch in vCenter.

We’ll also add in our newly created Transport Zones

Afbeelding met tekst

Automatisch gegenereerde beschrijving

Creating Transport Node profile

We’ll select our Uplink profile and our IP Pool which we created earlier, finally we can set the mapping between the Uplinks

vCenter View

Creating Transport Node profile

Configure NSX on hosts

With our Transport Node profile we can go ahead and configure our ESXi hosts for NSX

Configure cluster for NSX

Afbeelding met tekst

Automatisch gegenereerde beschrijving

Select profile

After selecting the profile NSX Manager will go ahead and configure our ESXi hosts.

Hosts configuring

After a few minutes our hosts should be configured and ready for NSX

Afbeelding met tekst, schermafbeelding, monitor, scherm

Automatisch gegenereerde beschrijving

Hosts configured

Trunk segment

Next up is to create our Edge VMs which we will need for our Gateways and Services (NAT, DHCP, Load Balancer).

But before we deploy those we’ll have to create a segment for the uplink of the Edge VMs. This will be a Trunk segment which we create in NSX. Initially I created a Trunk portgroup on the VDS in vSphere, but that doesn’t work. The Trunk needs to be configured as a logical segment in NSX-T when using the same VLAN for both the Hypervisor TEPs and the Edge VM TEPs

Afbeelding met tekst

Automatisch gegenereerde beschrijving

Trunk segment

Edge VM

Now we can deploy our Edge VM(s). I’m using Medium sized VMs in my environment. Note that the Edge VMs is not strictly necessary for the test we’ll perform later on with connecting two VMs, but if we want to use some services later on, like DHCP, Load balancing and so on we’ll need them.

Deploy edge VM

Deploy edge VM

Note the NSX config, where we set the switch name, the Transport Zones we created, the Uplink profile, the IP pool and finally we use the newly created Trunk segment for the Edge uplink

NSX Edge config

Edge cluster

We’ll also create an Edge cluster and add the Edge VM to it

Edge cluster

Summary

Wow, this was a lot of configuring, but that was also the whole point of doing this blog post. Stuff like this is learnt best while getting your hands dirty and do some actual work. And I learn even better when I’m writing and documenting it as well.

In the next blog post we’ll test the fabric to see if what we’ve done is working. We’ll also try to get some external connectivity to our environment.

Hopefully this post can help someone, if not it has at least helped me.

Thanks for reading!

Special thnx for https://rudimartinsen.com/2021/06/29/nsx-t-31-homelab/ for his blog post

Translate »