For your VCF homelab you wan to keep the resources small with a little bit overhead.
In this post I will talk about how i managed to deploy a VCF Workload Domain with a single NSX Manager, instead of the standard three nsx nodes.
Warning: Use this only in a Homelab!
The trick is to SSH into your SDDC Manager using the vcf user, and the password used during bring-up of the management domain.
When logged in, run su and log in as root using the password used during bring-up.
run: vi /etc/vmware/vcf/domainmanager/application-prod.properties
Hit i in your keyboard to go into insert mode. Go to the end of the file, and append the following:
This will make it so that any workload domain you deploy has one NSX Manager, and that it uses a smaller size. Once done, hit ESC in your keyboard, then type :wq and hit enter to save the file. (w = write, q = quit).
Then run systemctl restart domainmanager and you are good to go!
This worked in my nested Cloud Foundation deployment in my lab running 5.2.1.0.
You will still have to fill in the information for the extra nodes in the UI.
By passing either of the new VCP-VCF level certification exam(s), anyone maintaining an active VMUG Advantage membership can receive 3 years worth of extensive VMware Cloud Foundation licensing for home lab use!
The VMUG Advantage program has offered affordable home lab VMware licensing packages for years, but did cover most over the entire product portfolio.
Last year Broadcom made a change into this.
Option 1: Get vSphere Standard Edition 32 cores for 1 year: Pass one of the following VCP certification exams
VCP-VVF (admin/architect)
VCP-VCF (admin/architect)
Option 2: Get VMware Cloud Foundation (VCF) 128 cores for 3 years: Purchase & Maintain VMUG Advantage, pass the following VCP certification exam.
VCP-VCF (admin/architect)
A VMUG Advantage membership was complimentary for vExperts in 2025
The membership is $210 otherwise, and does include a voucher for a 50% discounted VCP-VCF exam
VMware Skyline was great:
• Proactive Issue Identification
• Automated Insights
• Health Scans and Remediation
• Integration with support
VMware by Broadcom are building critical Findings and Self-Help recommendations directly in product starting with VCF (from 5.2) and Aria Operations (from v8.18 July 2024)
Many of the other Skyline features are being planned for inclusion in future releases in Cloud Foundation and Aria Operations. We will see what the future will bring.
But for now how do you get this working.
Microsoft has identified an issue that affects Windows Server domain controllers (DCs), and has expedited a resolution that can be applied to affected devices. Out-of-band (OOB) updates have been released for some versions of Windows today, March 22, 2024, to addresses this issue related to a memory leak in the Local Security Authority Subsystem Service (LSASS). This occurs when on-premises and cloud-based Active Directory domain controllers service Kerberos authentication requests.
This issue is not expected to impact Home users, as it is only observed in some versions of Windows Server. Domain controllers are not commonly used in personal and home devices.
Updates are available on the Microsoft Update Catalog only. These are cumulative updates, so you do not need to apply any previous update before installing them, and they supersede all previous updates for affected versions. If your organization uses the affected server platforms as DCs and you haven’t deployed the March 2024 security updated yet, we recommend you apply this OOB update instead. For more information and instructions on how to install this update on your device, consult the below resources for your version of Windows:
Sometimes you want to make a design of something.
A whiteboard is then very handy. In most cases you would to like to use Microsoft Visio.
But on my home pc I don’t have Visio. A free alternative is Excalidraw.
You can draw some thing cool like this: (This for Demo only has no function)
So I interested to trying to deploy latest release of VMware Cloud Foundation (VCF) 5.0 on my Windows 11 Home PC witch have 128GB and 16 core intel cpu.
VCF-M01-CB01 (4GB and 4CPU) Only needed through First Deploment
Network settings on my PC
1 IP In my home network
172.16.12.1 (To Fool Cloudbuilder)
172.16.13.1 (To Fool Cloudbuilder)
Procedure:
Install en Configure ESXi
Step 1 – Boot up the ESXi installer from de iso mount and then perform a standard ESXi installation.
Step 2 – Once ESXi is up and running, you will need to minimally configure networking along with an FQDN (ensure proper DNS resolution), NTP and specify which SSD should be used for the vSAN capacity drive. You can use the DCUI to setup the initial networking but recommend switching to ESXi Shell afterwards and finish the require preparations steps as demonstrated in the following ESXCLI commands:
esxcli system ntp set -e true -s pool.ntp.org
esxcli system hostname set –fqdn vcf-m01-esx01.wardvissers.nl
Note: Use vdq -q command to query for the available disks for use with vSAN and ensure there are no partitions residing on the 600GB disks.
Don’t change time server pool.ntp.org.
To ensure that the self-signed TLS certificate that ESXi generates matches that of the FQDN that you had configured, we will need to regenerate the certificate and restart hostd for the changes to go into effect by running the following commands within ESXi Shell:
Step 3 – Deploy the VMware Cloud builder in a separate environment and wait for it to be accessible over the browser. Once CB is online, download the setup_vmware_cloud_builder_for_one_node_management_domain.sh setup script and transfer that to the CB system using the admin user account (root is disabled by default).
Step 4 – Switch to the root user and set the script to have the executable permission and run the script as shown below
su –
chmod +x setup_vmware_cloud_builder_for_one_node_management_domain.sh
./setup_vmware_cloud_builder_for_one_node_management_domain.sh
The script will take some time, especially as it converts the NSX OVA->OVF->OVA and if everything was configured successfully, you should see the same output as the screenshot above.
Step 4 – Download the example JSON deployment file vcf50-management-domain-example.json and and adjust the values based on your environment. In addition to changing the hostname/IP Addresses you will also need to replace all the FILL_ME_IN_VCF_*_LICENSE_KEY with valid VCF 5.0 license keys.
Step 5 – The VMnic in the Cloud Builder VM will acked als a 10GB NIC so I started the deployment not through powershell but normal way in Cloud Builder GUI.
Your deployment time will vary based on your physical resources but it should eventually complete with everything show success as shown in the screenshot below. (I have one retry for finish)
Here are some screenshots VCF 5.0 deployment running on my home PC.
The VMware Cloud Foundation (VCF) Holodeck Toolkit is designed to provide a scalable, repeatable way to deploy nested Cloud Foundation hands-on environments directly on VMware ESXi hosts. These environments are ideal for multi-team hands on exercises exploring the capabilities of utilitizing VCF to deliver a Customer Managed VMware Cloud.
Delivering labs in a nested environment solves several challenges with delivering hands-on for a product like VCF, including:
Reduced hardware requirements: When operating in a physical environment, VCF requires four vSAN Ready Nodes for the management domain, and additional hosts for adding clusters or workload domains. In a nested environment, the same four to eight hosts are easily virtualized to run on a single ESXi host.
Self-contained services: The Holodeck Toolkit configuration provides common infrastructure services, such as NTP, DNS, AD, Certificate Services and DHCP within the environment, removing the need to rely on datacenter provided services during testing. Each environment needs a single external IP.
Isolated networking. The Holodeck Toolkit configuration removes the need for VLAN and BGP connections in the customer network early in the testing phase.
Isolation between environments. Each Holodeck deployment is completely self-contained. This avoids conflicts with existing network configurations and allows for the deployment of multiple nested environments on same hardware or datacenter with no concerns for overlap.
Multiple VCF deployments on a single VMware ESXi host with sufficient capacity. A typical VCF Standard Architecture deployment of four node management domain and four node VI workload domain, plus add on such as VMware vRealize Automation requires approximately 20 CPU cores, 512GB memory and 2.5TB disk.
Automation and repeatability. The deployment of nested VCF environments is almost completely hands-off, and easily repeatable using configuration files. A typical deployment takes less than 3 hours, with less than 15 min keyboard time.
Nested Environment Overview
The “VLC Holodeck Standard Main 1.3” configuration is a nested VMware Cloud Foundation configuration used as the baseline for several Private Cloud operation and consumption lab exercises created by the Cloud Foundation Technical Marketing team. The Holodeck standard “VLC-Holo-Site-1” is the primary configuration deployed. The optional VLC-Holo-Site-2 can be deployed at any time later within a Pod. VLC-Holo-Site-1 configuration matches the lab configuration in the VCF Hands-On Lab HOL-2246 and the nested configuration in the VCF Experience program run on the VMware Lab Platform.
Each Pod on a Holodeck deployment runs an identical nested configuration. A pod can be deployed with a standalone VLC-Holo-Site-1 configuration, or with both VLC-Holo-Site-1 and VLC-Holo-Site-2 configurations active. Separation of the pods and between sites within a pod is handled at the VMware vSphere Standard Switch (VSS) level. Each Holodeck pod connects to a unique VSS and Port Group per site. A VMware vSphere Port Group is configured on each VSS and configured as a VLAN trunk.
Components on the port group to use VLAN tagging to isolate communications between nested VLANs. This removes the need to have physical VLANs plumbed to the ESXi host to support nested labs.
When the Holo-Site-2 configuration is deployed it uses a second VSS and Port Group for isolation from Holo-Site-1
The VLC Holodeck configuration customizes the VCF Cloud Builder Virtual Machine to provide several support services within the pod to remove the requirement for specific customer side services. A Cloud Builder VM is deployed per Site to provide the following within the pod:
DNS (local to Site1 and Site2 within the pod, acts as forwarder)
NTP (local to Site1 and Site2 within the pod)
DHCP (local to Site1 and Site2 within the pod)
L3 TOR for vMotion, vSAN, Management, Host TEP and Edge TEP networks within each site
BGP peer from VLC Tier 0 NSX Application Virtual Network (AVN) Edge (Provides connectivity into NSX overlay networks from the lab console)
The figure below shows a logical view of the VLC-Holo-Site-1 configuration within a Holodeck Pod. The Site-1 configuration uses DNS domain vcf.sddc.lab.
Figure 1: Holodeck Nested Diagram
The Holodeck package also provides a preconfigured Photon OS VM, called “Holo-Router”, that functions as a virtualized router for the base environment. This VM allows for connecting the nested environment to the external world. The Holo-Router is configured to forward any Microsoft Remote Desktop (RDP) traffic to the nested jump host, known as the Holo-Console, which is deployed within the pod.
The user interface to the nested VCF environment is via a Windows Server 2019 “Holo-Console” virtual machine. Holo-Console provides a place to manage the internal nested environment like a system administrators desktop in a datacenter. Holo-Console is used to run the VLC package to deploy the nested VCF instance inside the pod. Holo-Console VM’s are deployed from a custom-built ISO that configures the following
Microsoft Windows Server 2019 Desktop Experience with:
Active directory domain “vcf.holo.lab”
DNS Forwarder to Cloud Builder
Certificate Server, Web Enrollment and VMware certificate template
RDP enabled
IP, Subnet, Gateway, DNS and VLAN configured for deployment as Holo-Console
Firewall and IE Enhanced security disabled
SDDC Commander custom desktop deployed
Additional software packages deployed and configured
Google Chrome with Holodeck bookmarks
VMware Tools
VMware PowerCLI
VMware PowerVCF
VMware Power Validated Solutions
PuTTY SSH client
VMware OVFtool
Additional software packages copied to Holo-Console for later use
VMware Cloud Foundation 4.5 Cloud Builder OVA to C:\CloudBuilder
VCF Lab Constructor 4.5.1 with dual site Holodeck configuration
VLC-Holo-Site-1
VLC-Holo-Site-2
VMware vRealize Automation 8.10 Easy Installer
The figure below shows the virtual machines running on the physical ESXi host to deliver a Holodeck Pod called “Holo-A”. Notice an instance of Holo-Console, Holo-Router, Cloud Builder and four nested ESXi hosts. They all communicate over the VLC-A-PG Port Group
Figure 2: Holodeck Nested Hosts
Adding a second site adds an additional instance of Cloud Builder and additional nested ESXi hosts. VLC-Holo-Site-2 connects to the second internal leg of the Holo-Router on VLAN 20. Network access from the Holo-Console to VLC-Holo-Site-2 is via Holo-Router.
The figure below shows a logical view of the VLC-Holo-Site-2 configuration within a Holodeck Pod. The Site-2 configuration uses DNS domain vcf2.sddc.lab
Figure 3: Holodeck Site-2 Diagram
Accessing the Holodeck Environment
User access to the Holodeck pod is via the Holo-Console. Access to Holo-Console is available via two paths:
Microsoft Remote Desktop Protocol (RDP) connection to the external IP of the Holo-Router. Holo-Router is configured to forward all RDP traffic to the instance of Holo-Console inside the pod.
Good (One pod): Single ESXi host with 16 cores, 384gb memory and 2TB SSD/NVME
Better (Two pod): Single ESXi host with 32 cores, 768gb memory and 4TB SSD/NVME
Best (Four or more pods): Single ESXi host with 64+ cores, 2.0TB memory and 10TB SSD/NVME
ESXi Host Configuration:
vSphere 7.0U3
Virtual switch and port group configured with uplinks to customer network/internet
Supports stand alone, non vCenter Server managed host and single host cluster managed by a vCenter server instance
Multi host clusters are NOT supported
Holo-Build host
Windows 2019 host or VM with local access to ESXI hosts used for Holodeck + internet access to download software. (This package has been tested on Microsoft Windows Server 2019 only)


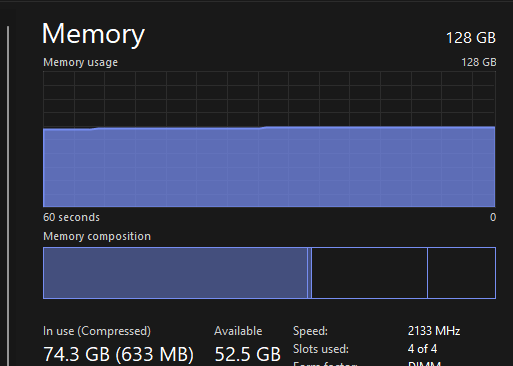


 Figure 1: Holodeck Nested Diagram

You must be logged in to post a comment.