Windows Server 2025 Preview (Build: Canary 26052)

I had some time to check out the new version of Server 2025.

For the full upcomming features check: https://ignite.microsoft.com/en-US/sessions/f3901190-1154-45e3-9726-d2498c26c2c9?source=sessions

Download Server 2025 Preview: https://www.microsoft.com/en-us/software-download/windowsinsiderpreviewserver

Server 2025 will come with a lot of features (My Top 20+):

  • General – Server 2022 upgrade to .vNext (Controled bij GPO)
  • Hot Patching (Arc Enabled, Monthly Subscription)
  • Active Directory – 32k page
  • Active Directory – Numa
  • Active Directory – LDAP TLS 1.3
  • Active Directory – Improved Security for Confidential Attributes
  • Active Directory – Active Directory LDAP prefers Encryption bij Default
  • Active Directory – Kerberos Support for AES/SHA256/384
  • Active Directory – Changes to Default behavior of legacy SAM RPC Spassword change methods
  • Active Directory – Kerberos en KPINT Support cryptographic agility
  • Active Directory – New AD Forest en Domein Level (Minimal Server 2016 requirement)
  • Storage – NVME 70%/90% peformance increase
  • File Server – SMB over Internet (Quick Protocol)
  • File Server – More Control over SLTM
  • File Server – SMB Limitor (Enabeld bij Default)
  • File Server – Signing by Default
  • File Server – Minimum version SMB
  • File Server – More Secure Bij Default (Netbios disabled bij default)
  • RDS – M365 Apps stil supported for every Windows Server release 2-3 years
  • Finance – General support and Pay-as-you-go Support

Need to find some time to dig in

Handy link: https://techcommunity.microsoft.com/t5/windows-server-insiders/announcing-windows-server-preview-build-26040/m-p/4040858

VCF 5.0 running inside Nested ESXi server with only 64GB Memory

So I interested to trying to deploy latest release of VMware Cloud Foundation (VCF) 5.0 on my Windows 11 Home PC witch have 128GB and 16 core intel cpu.

William Lee wrote a nice artikel about VMware Cloud Foundation 5.0 running on Intel NUC

Disclaimer: This is not officially supported by VMware, please use at your own risk.

Requirements:

  • VMware Cloud Builder 5.0 OVA (Build 21822418)
  • VCF 5.0 Licenses Through VMUG ADVANTAGE
  • Home PC (Not Special Hardware)
    – 128GB Memory
    – Intel 12600 CPU
    – 4TB of NVME Storage
  • Windows 11 with VMware Workstation 17

Setup

Virtual Machines

  • DC02 (Domain Controller, DNS Server) (4GB 2vcpu)
  • VCF-M01-ESX01 (ESXi 8.0 Update 1a) (64GBGB 1x140GB 2x600NVME 2x NIC) (Every Thin Provisiond)
  • VCF-M01-CB01 (4GB and 4CPU) Only needed through First Deploment

Network settings on my PC

  • 1 IP In my home network
  • 172.16.12.1 (To Fool Cloudbuilder)
  • 172.16.13.1 (To Fool Cloudbuilder)

Procedure:

Install en Configure ESXi

Step 1 – Boot up the ESXi installer from de iso mount and then perform a standard ESXi installation.

Step 2 – Once ESXi is up and running, you will need to minimally configure networking along with an FQDN (ensure proper DNS resolution), NTP and specify which SSD should be used for the vSAN capacity drive. You can use the DCUI to setup the initial networking but recommend switching to ESXi Shell afterwards and finish the require preparations steps as demonstrated in the following ESXCLI commands:

esxcli system ntp set -e true -s pool.ntp.org
esxcli system hostname set –fqdn vcf-m01-esx01.wardvissers.nl

Note: Use vdq -q command to query for the available disks for use with vSAN and ensure there are no partitions residing on the 600GB disks.
Don’t change time server pool.ntp.org.

To ensure that the self-signed TLS certificate that ESXi generates matches that of the FQDN that you had configured, we will need to regenerate the certificate and restart hostd for the changes to go into effect by running the following commands within ESXi Shell:

/bin/generate-certificates
/etc/init.d/hostd restart

Cloudbuilder Config

Step 3 – Deploy the VMware Cloud builder in a separate environment and wait for it to be accessible over the browser. Once CB is online, download the setup_vmware_cloud_builder_for_one_node_management_domain.sh setup script and transfer that to the CB system using the admin user account (root is disabled by default).

Step 4 – Switch to the root user and set the script to have the executable permission and run the script as shown below

su –
chmod +x setup_vmware_cloud_builder_for_one_node_management_domain.sh
./setup_vmware_cloud_builder_for_one_node_management_domain.sh

The script will take some time, especially as it converts the NSX OVA->OVF->OVA and if everything was configured successfully, you should see the same output as the screenshot above.

A screenshot of a computer

Description automatically generated

Step 4 – Download the example JSON deployment file vcf50-management-domain-example.json and and adjust the values based on your environment. In addition to changing the hostname/IP Addresses you will also need to replace all the FILL_ME_IN_VCF_*_LICENSE_KEY with valid VCF 5.0 license keys.

Step 5 – The VMnic in the Cloud Builder VM will acked als a 10GB NIC so I started the deployment not through powershell but normal way in Cloud Builder GUI.

Your deployment time will vary based on your physical resources but it should eventually complete with everything show success as shown in the screenshot below. (I have one retry for finish)
A screenshot of a computer

Description automatically generated A screenshot of a cloud support

Description automatically generated
Here are some screenshots VCF 5.0 deployment running on my home PC.

A screenshot of a computer

Description automatically generated

A screenshot of a computer

Description automatically generated

Problems

Check this if you have problems logging in NSX:
https://www.wardvissers.nl/2023/07/26/nsx-endless-spinning-blue-cirle-after-login/

Next Steps.

1. Reploy with use of the Holo-Router https://core.vmware.com/resource/holo-toolkit-20-deploy-router#deploy-holo-router

2. Testing if can deploy Single Host VCF Workload Domain, on same way by following this blog post HERE! 😁
A screenshot of a computer

Description automatically generated

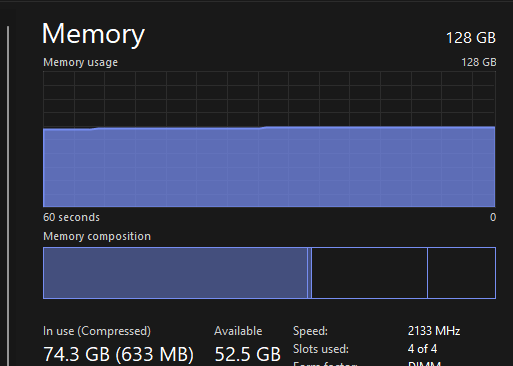
If I can start another 64GB ESXi Server.

Upcoming change (March 2020) – Microsoft to disable use of unsigned LDAP port 389

In March 2020, Microsoft is going to release a update which will essentially disable the use of unsigned LDAP which will be the default. This means that you can no longer use bindings or services which binds to domain controllers over unsigned ldap on port 389. You can either use LDAPS over port 636 or using StartTLS on port 389 but it still requires that you addd a certificate to your domain controllers. This hardening can be done manually until the release of the security update that will enable these settings by default.

How to add signed LDAPS to your domain controllers

You can read more about the specific change here –> https://support.microsoft.com/en-us/help/4520412/2020-ldap-channel-binding-and-ldap-signing-requirement-for-windows you can also read more here –> https://techcommunity.microsoft.com/t5/core-infrastructure-and-security/ldap-channel-binding-and-ldap-signing-requirements-update-now/ba-p/921536

After the change the following features will be supported against Active Directory.

clipboard_image_0.png

How will this affect my enviroment?

Clients that rely on unsigned SASL (Negotiate, Kerberos, NTLM, or Digest) LDAP binds or on LDAP simple binds over a non-SSL/TLS connection stop working after you make this configuration change. This also applies for 3.party solutions which rely on LDAP such as Citrix NetScaler/ADC or other Network appliances, Vault and or authentication mechanisms also rely on LDAP. If you haven’t fixed this it will stop working. This update will apply for all versions.

Windows Server 2008 SP2,
Windows 7 SP1,
Windows Server 2008 R2 SP1,
Windows Server 2012,
Windows 8.1,
Windows Server 2012 R2,
Windows 10 1507,
Windows Server 2016,
Windows 10 1607,
Windows 10 1703,
Windows 10 1709,
Windows 10 1803,
Windows 10 1809,
Windows Server 2019,
Windows 10 1903,
Windows 10 1909

How to check if something is using unsigned LDAP?

If the directory server is configured to reject unsigned SASL LDAP binds or LDAP simple binds over a non-SSL/TLS connection, the directory server will log a summary under eventid 2888 one time every 24 hours when such bind attempts occur. Microsoft advises administrators to enable LDAP channel binding and LDAP signing as soon as possible before March 2020 to find and fix any operating systems, applications or intermediate device compatibility issues in their environment.

You can also use this article to troubleshoot https://docs.microsoft.com/en-us/archive/blogs/russellt/identifying-clear-text-ldap-binds-to-your-dcs

Credits: https://msandbu.org/upcoming-change-microsoft-to-disable-use-of-unsigned-ldap-port-389/

Important information before upgrading to vSphere 6.7 (KB53704)

This article provides important documentation and upgrade information that must be reviewed before upgrading to vSphere 6.7.


Resolution


Compatibility considerations

TLS protocols

These products are not compatible with vSphere 6.7 at this time:

  • VMware NSX
  • VMware Integrated OpenStack (VIO)
  • VMware vSphere Integrated Containers (VIC)
  • VMware Horizon

Environments with these products should not be upgraded to vSphere 6.7 at this time. This article and the VMware Product Interoperability Matrixes will be updated when a compatible release is available.

Upgrade Considerations

Before upgrading your environment to vSphere 6.7, review these critical articles to ensure a successful upgrade
For vSphere

Upgrades to vSphere 6.7 are only possible from vSphere 6.0 or vSphere 6.5. If you are currently running vSphere 5.5, you must first upgrade to either vSphere 6.0 or vSphere 6.5 before upgrading to vSphere 6.7.

For vCenter Server

For Distributed Virtual Switches

Exchange 2016 Cumulative Update 9 and Exchange 2013 Cumulative Update 20

On March 20, 2018 Microsoft has released two new quarterly updates:

  • Exchange 2016 Cumulative Update 9 (CU9)
  • Exchange 2013 Cumulative Update 20 (CU20)
TLS 1.2

There aren’t too many new features in these CUs. The most important ‘feature’ is that TLS 1.2 is now fully supported (most likely you already have TLS 1.2 only on your load balancer). This is extremely supported since Microsoft will support TLS 1.2 ONLY in Office 365 in the last quarter of this year (see the An Update on Office 365 Requiring TLS 1.2 Microsoft blog as well).

Dot.net Support

Support for .NET Framework 4.7.1, or the ongoing story about the .NET Framework. The .NET Framework 4.7.1 is fully supported by Exchange 2016 CU9 and Exchange 2013 CU20. Why is this important? For the upcoming CUs in three months (somewhere in June 2018) the .NET Framework 4.7.1 is mandatory, so you need these to be installed in order to install these upcoming CUs.

Please note that .NET Framework 4.7 is NOT supported!

If you are currently running an older CU of Exchange, for example Exchange 2013 CU12, you have to make an intermediate upgrade to Exchange 2013 CU15. Then upgrade to .NET Framework 4.6.2 and then upgrade to Exchange 2013 CU20. If you are running Exchange 2016 CU3 or CU4, you can upgrade to .NET Framework 4.6.2 and then upgrade to Exchange 2016 CU9.

Schema changes

If you are coming from a recent Exchange 2013 CU, there are no schema changes since the schema version (rangeUpper = 15312) hasn’t changed since Exchange 2013 CU7. However, since there can be changes in (for example) RBAC, it’s always a good practice to run the Setup.exe /PrepareAD command. For Exchange 2016, the schema version (rangeUpper = 15332) hasn’t changed since Exchange 2016 CU7.

As always, check the new CUs in your lab environment before installing into your production environment!!

Exchange 2016 CU9 Information and download Links
Exchange 2013 CU20 Information and download Links

Exchange Server 2013 enters the Extended Support phase of product lifecycle on April 10th, 2018. During Extended Support, products receive only updates defined as Critical consistent with the Security Update Guide. For Exchange Server 2013, critical updates will include any required product updates due to time zone definition changes.

RVtools 3.10 Released

Version 3.10 (February, 2018)
– Upgraded RVTools solution to Visual Studio 2017
– Upgraded RVTools to .Net Framework version 4.6.1
– Upgraded Log4net to version 2.0.8, Waffle.AD to version 1.8.3
and NPOI to version 2.3.0
– Connection error when TLSv1.0 and TLSv1.1 are disabled and only TLSv1.2 is
enabled is solved by using .Net Framework 4.6.1
– vInfo tab page new columns: The latency-sensitivity setting of the virtual
machine, Change Block Tracking (CBT) and disk.EnableUUID values
– vDisk tab page new columns: SCSI label, unit number and sharedBus
– vHost tab page new columns: Assigned License(s), ATS heartbeat, ATS locking
values. 0 = disabled 1 = enabled, Host Power Policy shortname, CPU Power
Management current policy and CPU power hardware support
– When Export to xlsx is executed a metadata worksheet with version number of
RVTools and date time stamp is added to the output xlsx file
– All columns in the RVTools export xlsx file(s) now have a filter
– When export to csv newline characters are replaced by spaces
– When started from cli and login fails an error message and login box was
displayed. Now RVTools will exit with exit code -1, without showing the error
message and login form.
– Added an example PowerShell script with which you can merge RVTools export
xlsx files
– Added a example PowerShell script to start Export all to xlsx for multiple vCenters
– vDatastore tab page: For NFS datastores the address column is now filled with
remote host and path info
– vDatastore tab page new columns: Datastore Cluster Name, Cluster capacity and
Cluster free space
– The upper limit on the Health check for number of VMs on a datastore is now
9999
– vHealth tab page: new column “message type” which can be used as a filter in
Excel
– vHealth tab page: hbrdisk.RDID files are no longer reported as possible zombie
files
– vHealth tab page: low disk space messages no also show the free space in MB.
– All tab pages: Refresh or auto-refresh will respect your sort order
– CLI export2xls parameters changed to export2xlsx (old parameter will still work)
– Bug Fix: invalid “Horizontal Alignment” value in xlsx style sheet.
– Bug Fix: Calculation of total snapshot size was not always correct
– Bug Fix: Child snapshot hierarchy was not always correct
– Default installation directory is changed to C:\Program Files
(x86)\RobWare\RVTools without the version number

Documentation

Download

EXCHANGE 2013 CU17 AND EXCHANGE 2016 CU6

On June 27, 2017 Microsoft has released its quarterly updates for Exchange 2013 and Exchange 2016. The current version is now at Exchange 2013 CU17 (15.0.1320.4) and Exchange 2016 CU6(15.1.1034.26) . But this time there are some interesting things I’d like to point out.

A couple of days before the release of Exchange 2016 CU6 (15.1.1034.26)
Microsoft blogged about Sent Items Behavior Control and Original Folder Item Recovery. With the Sent Items Behavior Control, a message that’s sent using the Send As or Send on behalf of permission is not only stored in the mailbox of the user that actually sent the message, but a copy is also stored in the delegator mailbox sent items. This was already possible for shared mailboxes, but now it’s also possible for regular mailboxes (like manager/assistant scenarios).

The Original Folder Item Recovery feature is I guess on of the most requested features. In the past (before Exchange 2010) when items were restored after they were deleted, they were restored to their original location. With the Dumpster 2.0 that was introduced with Exchange 2010 this was no longer possible, and items were restored to the deleted items folder. In this case the items had to be moved manually to their original location. With the introduction of the Original Folder Item Recovery the restore of deleted items again takes place in the original folder.

Unfortunately, both Sent Items Behavior Control and Original Folder Item Recovery are only available in Exchange 2016 CU6 (and NOT in Exchange 2013 CU17).

When it comes to security TLS 1.2 is a hot topic. Microsoft is aware of this and working hard towards an Exchange environment that only uses TLS 1.2 (so that TLS 1.1 and TLS 1.0 can be disabled). We are not yet at that stage. Exchange 2016 CU6 does have improved support for TLS 1.2, but Microsoft is not encouraging customers to move to a TLS 1.2 environment only.

.NET Framework and Exchange server continues to be a difficult scenario. This is understandable, Exchange is just a consumer of Windows and .NET so the Exchange Product Group does not have much influence on the .NET (and Windows) Product Group.

Exchange 2016 CU6 does NOT support.NET Framework 4.7 at this moment, and you should NOT install .NET Framework on a server running Exchange 2016. Not before and not after the installation of Exchange 2016 CU6. This is also true for Exchange Server 2013 CU17. More information regarding .NET Framework and Exchange server can be found here: https://blogs.technet.microsoft.com/exchange/2017/06/13/net-framework-4-7-and-exchange-server/.

The .NET Framework 4.6.2 is supported by Exchange 2016 CU3 and higher and Exchange 2013 CU15 and higher. For a complete overview of which scenarios are supported, navigate to the Exchange Server Supportability Matrix on https://technet.microsoft.com/en-us/library/ff728623(v=exchg.150).aspx.

KB articles that describe the fixes, features and information in each release are available as follows:

Version

Build

KB Article

Download

UMLP

Schema Changes

Exchange 2016 CU6

15.1.1034.26

KB4012108

Download

UMLP

Yes

Exchange 2013 CU17

15.0.1320.4

KB4012114

Download

UMLP

No

Source: jaapwesselius

IIS Crypto the best tool to configure SSL/TLS cipher suites

IIS Crypto is a free tool that gives administrators the ability to enable or disable protocols, ciphers, hashes and key exchange algorithms on Windows Server 2008, 2012 and 2016. It also lets you reorder SSL/TLS cipher suites offered by IIS, implement best practices with a single click, create custom templates and test your website.

Features

– Single click to secure your website using best practices
– Create custom templates that can be saved and run on multiple servers
– Stop DROWN, logjam, FREAK, POODLE and BEAST attacks
– Disable weak protocols and ciphers such as SSL 2.0, 3.0 and MD5
– Enable TLS 1.1 and 1.2
– Enable forward secrecy
– Reorder cipher suites
– Built in Best Practices, PCI, PCI 3.1 and FIPS 140-2 templates
– Site scanner to test your configuration
– Command line version

Screenshot1

Translate »