Windows 7 & Windows 2008 R2 verschijnen dit jaar nog!!!

Microsoft heeft maandag bekendgemaakt dat Windows 7 nog dit jaar zal worden uitgebracht. De release moet voor de feestdagen een feit zijn. Dinsdag begint het bedrijf met een nieuwe test voor het updatemechanisme van het OS.

De onthulling dat Windows 7 in het vierde kwartaal verschijnt, werd gedaan op de maandag begonnen Microsoft Tech Ed-conferentie te Los Angeles, aldus Microsofts Windows Blog. Een definitieve releasedatum werd nog niet bekent gemaakt. Hoewel al enige tijd wordt verwacht dat het nieuwe besturingssysteem in het najaar verschijnt. Het standpunt van Microsoft was tot dus ver dat het OS maximaal drie jaar na de release van Vista op de markt zou komen, oftewel niet later dan 30 januari 2010. Microsoft heeft overigens voorts laten weten dat ook Windows Server 2008 R2 in het vierde kwartaal wordt vrijgegeven.

image

Eisen om Exchange 2010 te kunnen installeren

exchange2010logo
 

De beta van Exchange 2010 wordt alleen op Windows 2008 x64 standaard of Enterprise door Microsoft ondersteund. Windows 2008 R2 kan het wel in werken maar het wordt nog niet ondersteund. Zie voor Exchange 2010 blog voor meer infomatie.

Look here for Prepare Active Directory and Domains.

Algemene Voorbereiding

  1. Install Microsoft .NET Framework 3.5.
  2. Install Windows Remote Management ( WinRM ) 2.0 Community Technology Preview 3 (CTP3).
  3. Install Windows PowerShell V2 CTP3.

4. Install the update for the Microsoft Management Console (MMC) in Windows Server 2008. See Microsoft Knowledge Base article 951725 An update that extends the mechanism for displaying snap-in context Help topics is available for the MMC in Windows Server 2008.

5. Update from KB 951725
Update from KB 950888
Update from KB 951116
Update from KB 952664
Update from KB 953290
Update from KB 958178

Client Access servers

1. Install the Active Directory remote management tools by running the following command:

ServerManagerCmd -i RSAT-ADDS

2. Install the extensions for ASP.NET AJAX 1.0.

3. Install the necessary Internet Information Services (IIS) prerequisites by running the following commands in the order in which they are listed:

ServerManagerCmd -i Web-Server

ServerManagerCmd -i Web-ISAPI-Ext

ServerManagerCmd -i Web-Metabase

ServerManagerCmd -i Web-Lgcy-Mgmt-Console

ServerManagerCmd -i Web-Basic-Auth

ServerManagerCmd -i Web-Digest-Auth

ServerManagerCmd -i Web-Windows-Auth

ServerManagerCmd -i Web-Dyn-Compression

ServerManagerCmd -i NET-HTTP-Activation

ServerManagerCmd -I RPC-over-HTTP-proxy

Edge Transport servers

  1. Install Active Directory Lightweight Directory Services (AD LDS), which was previously known as Active Directory Application Mode (ADAM), by running the following command:

ServerManagerCmd -i ADLDS

Hub Transport servers

  1. Install the Active Directory remote management tools by running the following command:

ServerManagerCmd -i RSAT-ADDS

  1. Install the extensions for ASP.NET AJAX 1.0.
  2. Install the necessary Internet Information Services (IIS) prerequisites:

ServerManagerCmd -i Web-Server

ServerManagerCmd -i Web-Metabase

ServerManagerCmd -i Web-Lgcy-Mgmt-Console

ServerManagerCmd -i Web-Basic-Auth

ServerManagerCmd -i Web-Windows-Auth


Mailbox servers

  1. Install the Active Directory management tools by running the following command:

ServerManagerCmd -i RSAT-ADDS

  1. Install the extensions for ASP.NET AJAX 1.0.
  2. Install the 2007 Office System Converter: Microsoft Filter Pack.
  3. Install the necessary IIS prerequisites by running the following commands in the order in which they are listed:

ServerManagerCmd -i Web-Server

ServerManagerCmd -i Web-Metabase

ServerManagerCmd -i Web-Lgcy-Mgmt-Console

ServerManagerCmd -i Web-Basic-Auth

ServerManagerCmd -i Web-Windows-Auth


Clustered Mailbox

5. ServerManagerCmd -i Failover-Clustering


Unified Messaging servers

  1. Install the extensions for ASP.NET AJAX 1.0.
  2. Install the necessary IIS prerequisites by running the following commands in the order in which they are listed:

ServerManagerCmd -i Web-Server

ServerManagerCmd -i Web-Metabase

ServerManagerCmd -i Web-Lgcy-Mgmt-Console

ServerManagerCmd -i Web-Basic-Auth

ServerManagerCmd -i Web-Windows-Auth

  1. Install the Microsoft Windows Media Player audio/video codecs required by the Unified Messaging server by running the following command:

clip_image002Copy Code

ServerManagerCmd -i Desktop-Experience

Exchange Management Tools

  1. Install the necessary IIS prerequisites by running the following commands:

ServerManagerCmd -i Web-Metabase

ServerManagerCmd -i Web-Lgcy-Mgmt-Console

To install the latest optional Windows Updates

  1. Install multiple Right Management Services (RMS) Client sessions update. See Knowledge Base article 950888 You cannot create multiple RMS Client sessions for one user context on a Windows Vista-based computer.
  2. Install performance counter updates. See Knowledge Base article 951116 A memory leak occurs in performance counters that are used to monitor Windows Server 2008-based computers.
  3. Install the System Center Operations Manager 2007 console update. See Knowledge Base article 951327 The System Center Operations Manager 2007 console may crash in Windows Server 2008 or in Windows Vista when you open the Health Explorer window.
  4. Install the Event Log service update. See Knowledge Base article 952664 The Event Log service may stop responding because of a deadlock on a Windows Server 2008-based computer.
  5. Install performance counter values update. See Knowledge Base article 953290 An application may crash when it uses legacy methods to query performance counter values in Windows Vista or in Windows Server 2008.
  6. Install Windows PowerShell V2 CTP3.

Handige Tool IntelliAdmin Network Administrator

– Valideer-installatie van 2009 Zomertijd Patch (Nieuw-Zeeland en Australië nu inbegrepen).
– Pushen 2009 Zomertijd patch voor Windows NT, 2000, XP en 2003 machines
– Uischakelen USB Drives
– Uitschakelen cd-rom-stations
– Uitschakelen Floppy-drives
– Voorkom dat de automatische installatie van IE 7
– Voorkom dat de automatische installatie van Internet Explorer 8
– Reboot-Machines
– Remote Uitschakelen Machines
– Logoff-Machines
– Zet de VNC-wachtwoord van remote machines
– Hou machines automatisch herstarten wanneer de automatische updates hebt voltooid
– Services Stoppen 
– Services Starten
– Schakel-diensten
– Serviceses aanpassen op handmatig op automatisch zetten. 
– Vanaf afstand Remote Desktop aan te zetten.

Download

VMware Server 2.0.1

VMware heeft buildnummer 156745 van zijn virtualisatie software Server 2.0.1 uitgebracht. Dit pakket doet zijn werk onder Linux en Windows en is in staat om via een virtuele machine diverse besturingssystemen op de hostcomputer te laten draaien. Voor de gast computer kan je gebruikmaken van verschillende BSD-varianten, diverse Linux-distributies, Solaris en Windows. Voor meer informatie verwijzen we jullie door naar deze pagina en deze handleiding in pdf-formaat. De lijst met veranderingen voor versie 2.0.1 ziet er als volgt uit:

What’s New
Server 2.0.1 is a maintenance release that resolves security as well as some known issues. With this release of VMware Server, certain new features and support have been added.
Support for New Guest Operating Systems
VMware provides support for the following operating systems for Server 2.0.1:

  • Asianux Server 3.0 Service Pack 1
  • CentoOS 4.7
  • CentOS 5.2
  • Windows Essential Business Server (EBS) and Small Business Server (SBS) 2008
  • Windows Small Business Server 2003 Service Pack 2
  • Windows XP Service Pack 3
  • Windows Vista Service Pack 1

Security Fixes:

  • VMnc codec heap overflow vulnerabilities
    The VMnc codec assists in record and replay of sessions which are records of the dynamic virtual machine state over a period of time. Two heap overflow vulnerabilities might allow a remote attacker to execute arbitrary code on VMware hosted products. For an attack to be successful, the user must visit a malicious Web page or open a malicious video file. The Common Vulnerabilities and Exposures project has assigned the names CVE-2009-0909 and CVE-2009-0910 to these issues.
  • A VMCI privilege escalation on Windows-based hosts or Windows-based guests
    The Virtual Machine Communication Interface (VMCI) provides fast and efficient communication between two or more virtual machines on the same host and between a virtual machine and the host operating system. A vulnerability in vmci.sys might allow privilege escalation on Windows-based machines. This might occur on Windows-based hosts or inside Windows-based guest operating systems. Current versions of ESX Server do not support the VMCI interface and hence they are not affected by this vulnerability. The Common Vulnerabilities and Exposures project has assigned the name CVE-2009-1147 to this issue.
  • A remote denial-of-service vulnerability in authd for Windows-based hosts
    A vulnerability in vmware-authd.exe might cause a denial-of-service condition on Windows hosts. The Common Vulnerabilities and Exposures project has assigned the name CVE-2009-0177 to this issue.
  • Updated vm-support script
    This release improves data collection when the vm-support script is run by the Server administrator on request of VMware support or its support partners. The file that contains the SSL keys for communication between Server and vCenter and other applications is no longer collected. For more details, see the KB article Data Security Best Practices – SSL keys for communicating with VirtualCenter and other applications (KB 1008166).
  • Windows-based host privilege escalation in hcmon.sys
    A vulnerability in an I/O Control (ioctl) function in hcmon.sys might be used to escalate privileges on a Windows-based host. The Common Vulnerabilities and Exposures project has assigned the name CVE-2009-1146 to this issue. New releases of hosted products address a denial-of-service problem described in CVE-2008-3761, which can only be exploited by a privileged Windows account.
  • Denial-of -service vulnerability in a virtual device
    A vulnerability in a guest virtual device driver might allow a guest operating system to cause the host and consequently any virtual machine on that host to fail. The Common Vulnerabilities and Exposures project has assigned the name CVE-2008-4916 to this issue.

Miscellaneous Fixes:

  • Mount installer option mounts current CD-ROM image instead of VMware Tools installer image
    If a CD-ROM image is mounted to a virtual machine with VMware Tools installed, the Mount installer option in the Web UI incorrectly mounts the CD-ROM image instead of the VMware Tools image. The issue is resolved in this release.
  • Unable to install the latest version of VIX API on Server 2.0.x
    You cannot install VMware VIX API 1.6.2 of due to an issue with the MSI installer for VIX API. This issue is resolved in this release.
  • The default VI Web Access HTTP connection port is 8222 and the default HTTPS port is 8333. If you use these defaults, or any values other than 80 (HTTP) and 443 (HTTPS), you must specify the port number when you connect to VMware Server using VI Web Access. You must also allow connection to these ports through your firewall. An example URL to connect to VI Web Access is http://server_host:8222 If you want to use ports 80 (HTTP) and 443 (HTTPS), override the default values during installation. Note: If you are running IIS or Apache web server on the default ports, specify alternate HTTP and HTTP ports when prompted by the Windows installer or vmware-config.pl. Alternatively, stop IIS’s default Web site or any other Web site running on these ports. On Linux, shut down Apache or any other application using these ports and make sure they are not configured to restart automatically. This issue is resolved in this release.

VMware heeft ESX(i) 3.5 U4 Vrijgegeven

VMware heeft update 4 vrijgegeven. Release info bekijk het HIER.

Bekijk zeker de  compatability matrix, ESX(i) 3.5 U4 vereist vCenter 2.5 U2 of hoger.

Nieuwe ondersteunende Functies

Nieuw ondersteunde Operating Systems:

  • SUSE Linux Enterprise Server 11 (32-bit and 64-bit).
  • SUSE Linux Enterprise Desktop 11 (32-bit and 64-bit).
  • Ubuntu 8.10 Desktop Edition and Server Edition (32-bit and 64-bit).
  • Windows Preinstallation Environment 2.0 (32-bit and 64-bit).

Nieuwe ondersteunde SAS/SATA controllers:

  • PMC 8011 (for SAS and SATA drives)
  • Intel ICH9
  • Intel ICH10
  • CERC 6/I SATA/SAS Integrated RAID Controller (for SAS and SATA drivers)
  • HP Smart Array P700m Controller

Expanded support for the Enhanced VMXNET driver :

  • Microsoft Windows Server 2003, Standard Edition (32-bit)
  • Microsoft Windows Server 2003, Standard Edition (64-bit)
  • Microsoft Windows Server 2003, Web Edition
  • Microsoft Windows Small Business Server 2003
  • Microsoft Windows XP Professional (32-bit)

Installatie (DPM 2007 SP1) System Center Data Protector Manager SP1 op Windows 2008 x64.

1. Vanaf een administrator command prompt voer het volgende uit: start /wait ocsetup.exe SIS-Limited /quiet /norestart.

2. Herstart de PC.

3. dpm1
 

4. dpm2

5. dpm3

6. dpm4

7. dpm5

8. dpm6

9. dpm7

10. dpm8

11. dpm9

12. dpm10

13. dpm11

14. dpm12

15. dpm13

16. Na de installatie is het kwestie van de PC her starten en kun je DPM gaan configureren

Exchange 2007 Server Installatie Handleiding Updates

Server Installatie Unattend Installatie van Exchange 2007

Microsoft heeft de handleidingen voor Installatie van Exchange 2007 aangepast en er is zelfs een nieuwe artikel bijgekomen: Installation Guide Template – Cluster Continuous Replication (Windows 2008)

De volgende dingen zijn aangepast aan de Transport Installatie Handleidingen
– Hoe de tijdelijke Storage Path aan te passen.
– Hoe je database cache grootte kunt aanpassen als je 4GB of meer geheugen voor de  
  Exchange server beschikbaar is.
– Hoe je optionele ESE performance punten kunt toevoegen.

De lijst met aanbevelen hot-fixen is bijgewerkt.
Het tunen van virtueel geheugen is ook bijgewerkt.

Voor Windows Server 2008 systemen:

Script om Application Templates voor Windows SharePoint Services 3.0 te installeren

Microsoft een een 40 tal templates beschikbaar gesteld voor Windows Sharepoint Services 3.0
http://technet.microsoft.com/en-us/windowsserver/sharepoint/bb407286.aspx

Microsoft levert voor deze templates geen installatie op.

De installatie gebeurd via de command prompt.
Installing application templates for Windows SharePoint Services 3.0

Rob Pellicaan heeft hier voor een mooi script inelkaar gezet die alle templates achter elkaar netjes importeerd.

Het script: (Opslaan als .cmd)

set cmmand="C:\Program Files\Common Files\Microsoft Shared\web server extensions\12\BIN\stsadm.exe"

%cmmand% -o addsolution -filename ApplicationTemplateCore.wsp
%cmmand% -o deploysolution -name ApplicationTemplateCore.wsp -allowgacdeployment -local
%cmmand% -o copyappbincontent

for /F %%i in (‘dir /b *.wsp’) do %cmmand% -o addsolution -filename %%i
for /F %%i in (‘dir /b *.wsp’) do %cmmand% -o deploysolution -name %%i -allowgacdeployment –local

Importeren & Exporteren DHCP Reserveringen Windows 2003 Server

Exporteren DHCP Reserveringen

netsh dhcp server [ip address] scope [scope address] dump>C:\dhcpreserveringen.txt

Open dhcpreserveringen.txt doe een zoek & vervang van de bron IP  vervang het IP van door van de server waar hij geïmporteerd moet worden. Controleer of de scope ook nog goed is.
Verwijder alles wat overbodig is.

Zorg er voor de op de server waar je het wilt importeren dat de scope is aangemaakt.

netsh exec C:\dhcpreserveringen.txt

Zorg wel ervoor dat alle reserveringen op alle dhcp servers het zelfde zijn.

Microsoft Artikelen:
How to use the Netsh utility to export and import DHCP scopes

Creating a Self-Signed SSL Certificate met MakeCert.exe

Waar vind je certificaten op je PC

Ik begin even met de basis Als u toepassingen gaat ontwikkelen die certificaten vereisen, zult u moeten weten waar de certificaten worden opgeslagen, evenals hoe te om de beheersinterface te navigeren. Er is een MMC (Microsoft Management Console) op elke pc aanwezig. Vanuit deze management console kunt u certificaten beheren. Certificaten kunnen opgeslagen worden worden onder Gebruikers Account of op de lokale Machine Opslag.

Voer de volgende stappen uit om Certificaten te laden uit de lokale computer account. Certificaten Management Console Openen.

1. Start à Uitvoeren

2. MMC

3. Bestand à Module Toevoegen / Verwijderen

4. Toevoegen

5. Certificaten

6. Computeraccount

7. De lokale PC waar deze wordt op uitgevoerd. à Voltooien

8. Sluiten à Ok
clip_image002

Je kunt de certificaten management console opslaan. Dit doe je op de volgende manier.
Bestand à Opslaan Als à Noem het certificaten.msc.

Sla het bestand bijvoorbeeld op je Desktop.

Als je Certificaten uit klikt (Lokale Gebruiker, Lokale Computer). Dan zie je certificaten opslagen

Personal. Here you store certificates for which you have the associated private key.

Trusted Root Certification Authorities. This store lists the Third-Party Root Certification Authorities (Thawte, Verisign, etc.), Microsoft root certificates, and your own root certificates for self-signed certificates.

Trusted People. Here you place your trusted certificates (you must also trust the entire chain of certificates).

Hoe kan ik mijn eigen test ssl certificaten aan maken voor websites of voor overige web diensten om het te beveiliging.

Dit is de meest gevraagde vraag die ik heb gehoord. Het is niet altijd gemakkelijk om een beknopte lijst van stappen te vinden om voor het creëren van certificaten te volgen. Er zijn drie populaire benaderingen van het produceren van certificaten voor testende doeleinden:

1.     Vraag een testcertificaat bij een certificaatgezag (CA), zoals Verisign. Deze zijn meestal 90 dagen geldig.

2.     Verstrek CA. uw eigen certificaten van uw Server 2003 Certificaat Server.
http://www.petri.co.il/install_windows_server_2003_ca.htm
http://www.petri.co.il/obtain_digital_certificate_from_online_ca.htm

3.     Produceer certificaten gebruikend makecert.exe.
4. Maak een Self-Signed Certificate gebruik makend van de SSL Diagnostics Tool

Het makkelijkste is makecert.exe te gebruiken. Dit hulpmiddel wordt geïnstalleerd tijdens de installatie van .NET Framework SDK (2.0 en 3.0 beide bevat makecert.exe).

MSDN verteld hoe u certificaat kunt maken (zie http://msdn2.microsoft.com/en-us/library/bfsktky3.aspx).


Het creëren van een SSL Certificaat

Om een Self-Signed SSL Certificate te creëren kunt u het volgende commando makecert.exe gebruiken.

makecert -r -pe -n "CN=www.wardvissers.nl" -b 01/01/2000 -e 01/12/2036 -eku 1.3.6.1.5.5.7.3.1 -ss my -sr localMachine -sky exchange -sp "Microsoft RSA SChannel Cryptographic Provider" -sy 12 c:localhost.cer

The subject name “localhost” makes it possible to browse without errors to http://localhost or any path relative to it. The subject name of the SSL certificate must match the domain or machine name used in the path to access the site. If you used your machine name to browse to Web sites on your machine, for example http://idesign/, you’d create the certificate with the subject name “CN=idesign”. Best use is enter de FQDN like: webmail.wardvissers.nl


makecert.exe opties

Hier onder staat een lijst met opties om een goede Self-Signed SSL Certificaten te maken.


Option

Description

-n certName

The subject name for the certificate. This is a distinguished name following the X.500 specification. It can be as simple as “CN=localhost” or include a richer description of the subject with “CN=localhost, O=IDesign, OU=Architecture, E=mlb@idesign.net”.

-pe

This allows the private key to be exported after generating it. It is a good idea to generate the private key pair and export the certificate to apply password protection, even if it is a test certificate.

-sr

Certificate store location where the key will be generated. It doesn’t matter which store you choose, because you will likely export the key pair, password protect it, and then import it to the correct store for use. Values can be currentuser or localmachine.

-ss

Which logical store will the certificate be installed in? Specify “My” here; this will place it in the Personal logical store.

-sp

The cryptography provider to use. A list of possible providers can be found here: http://windowssdk.msdn.microsoft.com/en-us/library/ms731160.aspx. The “Microsoft RSA SChannel Cryptographic Provider” is not subject to government restrictions for usage.

-sy

Cryptography provider type; an integer representative of the provider setting for the -sp option. Use the value 12 for the “Microsoft RSA SChannel Cryptographic Provider”.

-r

Indicates a self-signed certificate.

-sky certType

Can be signature or exchange. Use exchange for SSL and secure messaging.


Het uitvoeren van het Certificaat

De bedoeling is om .pfx (Certificaat + Wachtwoord) en een cer op te slaan voor later gebruik.

De .cer heb je al opgeslagen tijdens het aanmaken van het certificaat.
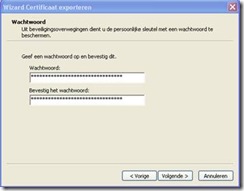
Via de Certificaten console kun je .pfx bestand exporteren.

Hoe je dat doet zie je hieronder:

RechterMuis op het Certificaat en dan Alle Taken à Exporteren

clip_image004
clip_image006

clip_image008

clip_image010

clip_image012

clip_image014

clip_image016
clip_image018
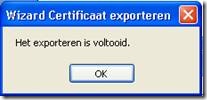
Voorbeeldje van de melding die je krijgt.

clip_image019

Translate »