Handige Trukjes van Makecert.exe om te weten

Creating X.509 Certificates using makecert.exe

Creating x.509  certificates is a very common task. Unfortunately the knowledge how to do it is quite rare. If you want a certificate that the whole world would trust you need to buy one, but if you need it for your own use you can create it using a tool called MakeCert.exe

After downloading the tool you have to perform the following procedure:

Creating a Root Certificate Authority

makecert.exe -n "CN=My Root CA,O=Organization,OU=Org Unit,L=San Diego,S=CA,C=US" -pe -ss my -sr LocalMachine -sky exchange -m 96 -a sha1 -len 2048 -r My_Root_CA.cer

Import Root Certificate Authority Certificate into Trusted Root Store

certutil.exe -f -addstore Root My_Root_CA.cer

Create Backup (Export) PFX file of Root Certificate Authority Certificate

certutil.exe -privatekey -exportpfx "My Root CA" My_Root_CA.pfx

Create a Server Certificate issued from the previously created Certificate Authority

makecert.exe -n "CN=Server" -pe -ss my -sr LocalMachine -sky exchange -m 96 -in "My Root CA" -is my -ir LocalMachine -a sha1 -eku 1.3.6.1.5.5.7.3.1,1.3.6.1.5.5.7.3.2 Server.cer

Create Backup (Export) PFX file of Server Certificate

certutil.exe -privatekey -exportpfx "Server" Server.pfx

Create a Computer certificate issued from the previously created Certificate Authority

makecert.exe -n "CN=Computer" -pe -ss my -sr Localmachine -sky exchange -m 96 -in "My Root CA" -is my -ir LocalMachine -a sha1 -eku 1.3.6.1.5.5.7.3.2 Computer.cer

Create Backup (Export) PFX file of Computer Certificate

certutil.exe -privatekey -exportpfx "Computer" Computer.pfx

OID Reference

Encrypting File System (1.3.6.1.4.1.311.10.3.4)

Secure Email (1.3.6.1.5.5.7.3.4)

Smart Card Logon (1.3.6.1.4.1.311.20.2.2)

Client Authentication (1.3.6.1.5.5.7.3.2)

Server Authentication (1.3.6.1.5.5.7.3.1)

IP security IKE intermediate (1.3.6.1.5.5.8.2.2)

Creating a Self-Signed SSL Certificate met MakeCert.exe

Waar vind je certificaten op je PC

Ik begin even met de basis Als u toepassingen gaat ontwikkelen die certificaten vereisen, zult u moeten weten waar de certificaten worden opgeslagen, evenals hoe te om de beheersinterface te navigeren. Er is een MMC (Microsoft Management Console) op elke pc aanwezig. Vanuit deze management console kunt u certificaten beheren. Certificaten kunnen opgeslagen worden worden onder Gebruikers Account of op de lokale Machine Opslag.

Voer de volgende stappen uit om Certificaten te laden uit de lokale computer account. Certificaten Management Console Openen.

1. Start à Uitvoeren

2. MMC

3. Bestand à Module Toevoegen / Verwijderen

4. Toevoegen

5. Certificaten

6. Computeraccount

7. De lokale PC waar deze wordt op uitgevoerd. à Voltooien

8. Sluiten à Ok
clip_image002

Je kunt de certificaten management console opslaan. Dit doe je op de volgende manier.
Bestand à Opslaan Als à Noem het certificaten.msc.

Sla het bestand bijvoorbeeld op je Desktop.

Als je Certificaten uit klikt (Lokale Gebruiker, Lokale Computer). Dan zie je certificaten opslagen

Personal. Here you store certificates for which you have the associated private key.

Trusted Root Certification Authorities. This store lists the Third-Party Root Certification Authorities (Thawte, Verisign, etc.), Microsoft root certificates, and your own root certificates for self-signed certificates.

Trusted People. Here you place your trusted certificates (you must also trust the entire chain of certificates).

Hoe kan ik mijn eigen test ssl certificaten aan maken voor websites of voor overige web diensten om het te beveiliging.

Dit is de meest gevraagde vraag die ik heb gehoord. Het is niet altijd gemakkelijk om een beknopte lijst van stappen te vinden om voor het creëren van certificaten te volgen. Er zijn drie populaire benaderingen van het produceren van certificaten voor testende doeleinden:

1.     Vraag een testcertificaat bij een certificaatgezag (CA), zoals Verisign. Deze zijn meestal 90 dagen geldig.

2.     Verstrek CA. uw eigen certificaten van uw Server 2003 Certificaat Server.
http://www.petri.co.il/install_windows_server_2003_ca.htm
http://www.petri.co.il/obtain_digital_certificate_from_online_ca.htm

3.     Produceer certificaten gebruikend makecert.exe.
4. Maak een Self-Signed Certificate gebruik makend van de SSL Diagnostics Tool

Het makkelijkste is makecert.exe te gebruiken. Dit hulpmiddel wordt geïnstalleerd tijdens de installatie van .NET Framework SDK (2.0 en 3.0 beide bevat makecert.exe).

MSDN verteld hoe u certificaat kunt maken (zie http://msdn2.microsoft.com/en-us/library/bfsktky3.aspx).


Het creëren van een SSL Certificaat

Om een Self-Signed SSL Certificate te creëren kunt u het volgende commando makecert.exe gebruiken.

makecert -r -pe -n "CN=www.wardvissers.nl" -b 01/01/2000 -e 01/12/2036 -eku 1.3.6.1.5.5.7.3.1 -ss my -sr localMachine -sky exchange -sp "Microsoft RSA SChannel Cryptographic Provider" -sy 12 c:localhost.cer

The subject name “localhost” makes it possible to browse without errors to http://localhost or any path relative to it. The subject name of the SSL certificate must match the domain or machine name used in the path to access the site. If you used your machine name to browse to Web sites on your machine, for example http://idesign/, you’d create the certificate with the subject name “CN=idesign”. Best use is enter de FQDN like: webmail.wardvissers.nl


makecert.exe opties

Hier onder staat een lijst met opties om een goede Self-Signed SSL Certificaten te maken.


Option

Description

-n certName

The subject name for the certificate. This is a distinguished name following the X.500 specification. It can be as simple as “CN=localhost” or include a richer description of the subject with “CN=localhost, O=IDesign, OU=Architecture, E=mlb@idesign.net”.

-pe

This allows the private key to be exported after generating it. It is a good idea to generate the private key pair and export the certificate to apply password protection, even if it is a test certificate.

-sr

Certificate store location where the key will be generated. It doesn’t matter which store you choose, because you will likely export the key pair, password protect it, and then import it to the correct store for use. Values can be currentuser or localmachine.

-ss

Which logical store will the certificate be installed in? Specify “My” here; this will place it in the Personal logical store.

-sp

The cryptography provider to use. A list of possible providers can be found here: http://windowssdk.msdn.microsoft.com/en-us/library/ms731160.aspx. The “Microsoft RSA SChannel Cryptographic Provider” is not subject to government restrictions for usage.

-sy

Cryptography provider type; an integer representative of the provider setting for the -sp option. Use the value 12 for the “Microsoft RSA SChannel Cryptographic Provider”.

-r

Indicates a self-signed certificate.

-sky certType

Can be signature or exchange. Use exchange for SSL and secure messaging.


Het uitvoeren van het Certificaat

De bedoeling is om .pfx (Certificaat + Wachtwoord) en een cer op te slaan voor later gebruik.

De .cer heb je al opgeslagen tijdens het aanmaken van het certificaat.
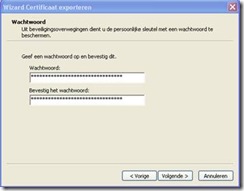
Via de Certificaten console kun je .pfx bestand exporteren.

Hoe je dat doet zie je hieronder:

RechterMuis op het Certificaat en dan Alle Taken à Exporteren

clip_image004
clip_image006

clip_image008

clip_image010

clip_image012

clip_image014

clip_image016
clip_image018
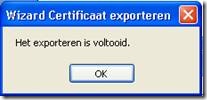
Voorbeeldje van de melding die je krijgt.

clip_image019

VMware Server 2.0 Tips and Tricks


Hierbij sommige  Tips & Tricks van VMWare Server 2.0

1. Use a web browser (Firefox and Internet Explorer are the two officially supported ones) to
connect to http://yourserver:8222 or https://yourserver:8333 if you selected the default
ports during installation/configuration.

2. If you manage from a Windows client then the VI (Virtual Infrastructure) client is also
available which is what is used to manage ESX/ESXi and Virtual Center too. It is available at
https://yourserver:8333/client/VMware-viclient.exe.

3. The VI Client cannot add USB devices to VMs running at hardware versions greater than 4 –
version 7 is required for USB 2.0 support.

4. Specify yourserver:8333 for the connection in the VI Client.

5. The credentials you specify to logon are admin credentials that you would use on the host
even without VMware installed – VMware does not introduce any credentials/accounts
itself.

6. The admin account you use must have a password defined for it or you will not be able to
login.

7. The remote console is a locally installed application which will be installed when the console
tab is first clicked onto.

8. For remote management through firewalls, VPNs or over SSH tunnels, port 902 is also used as well as 8222/8333. Note that during Linux configuration; you may have selected a
different port from 902 as sometimes it can be statically detected as being in use.

9 .Backing up VMs can be achieved in a number of ways:
a. If the VM is not powered up then simply copy all of its files to another location.
b. If the VM is running, take a snapshot and then copy the base disk file(s) to another
location (*.vmdk except *-00001*.vmdk). A new VM can then be constructed using
this disk. Note that you can only have a single snapshot.
c. In a Windows VM, use a VSS (Volume Shadow copy Service) aware backup tool to
create a backup that can then be restored using the same tool to a bare VM.
d. On a Windows host, use a VSS aware backup tool to backup the files that constitute
the VM.

10. If a VM fails to power on and was not shut down properly, check for .lck files/folders and
remove them if they exist as long as the VM definitely is not running.

11. Server 2.0 stores VMs in datastores – a default datastore is created which is calle
“[standard]” and will map to the root of the folder you select during installation.

12. VMs can be run from external USB drives by defining a datastore for the mount point.

13. Remote datastores can also be added – NFS for Linux hosts and CIFS/SMB for Windows.

Bekijk HIER de volledige PDF met Tips & Tricks van VMWare Server 2.0

Exchange Team Outlook Live

Exchange Team heeft weer een nieuwe video online gezet dit keer over Outlook Live.

De vernieuwde outlook versie maar dan online.

Het grootste voordeel van deze browser is dat hij meerdere browsers ondersteund zowel

(Firefox, Internet Explorer & Safari)

Meer over Outlook live bekijk het hier: http://get.liveatedu.com/Education/Connect/

Bekijk HIER de video in hoge kwaliteit.

Outlook Contacts to vCard (vcf) files

Ik was aan het zoeken op een het internet naar tooltje wat mijn contacten kan exporteren in een keer naar vcf file’s.
Ik vond verschillende tooltjes maar geen een die gratis was.
Tot ik het vb script vond van Dave Moats. Het werkt als een trein.

Aanroep:
C:scripts>cscript exportContacts.vbs /p:C:scriptsoutlookContacts
Microsoft (R) Windows Script Host Version 5.6
Copyright (C) Microsoft Corporation 1996-2001. All rights reserved.

Ward.vcf
Mark.vcf

Script:
==========================================================
‘==     VB Script to Export Outlook Contacts to vCard (vcf) files
‘==
‘==           Copyright © 2008, Dave Moats
‘==
‘== This sample is provided ‘AS-IS’, without any
‘== express or implied warranty. In no event will the
‘== authors be held liable for any damages arising from
‘== the use of this sample code.
‘==
‘== Permission is granted to anyone to use this sample
‘== code for any purpose, including commercial applications,
‘== subject to the following restrictions:
‘==
‘== The origin of this code must not be misrepresented;
‘== you must not claim that you wrote the original code.
‘==
‘== If you use this code, an acknowledgment in the
‘== documentation is requested – shown below:
‘==
‘==             Portions Copyright © 2008,
‘==        Dave Moats (http://www.davemoats.com/).
‘==
‘==========================================================

‘==========================================================
‘== NOTE: watch for wrapped lines and html special
‘==        characters in the web representation of this
‘==        sample code
‘==========================================================

‘==========================================================
‘==
‘== exportContacts.vbs – a script used to export contacts
‘==                        from outlook and save them in
‘==                        vcf format
‘==========================================================
option explicit

‘==========================================================
‘== declare the local variables to be used
‘==========================================================
dim scriptName, namedArgs, folderPath

‘==========================================================
‘== get the name of the running script
‘==========================================================
scriptName = wscript.scriptname

‘==========================================================
‘== get the named command line arguments
‘==========================================================
set namedArgs = wscript.arguments.named

if not namedArgs.exists("p") then
   wscript.echo "Usage: " & scriptName & " /p:<output folder path> is required"
   wscript.echo "Example: cscript " & scriptName & " /p:c:path to the folder"
   wscript.quit
else
   folderPath = namedArgs.item("p")
end if

set namedArgs = nothing

‘==========================================================
‘== now call the subroutine that does all the work
‘==========================================================
exportToVCF folderPath, ".vcf"

wscript.quit

‘==========================================================
‘== sub exportToVCF – subroutine that connects to outlook
‘==                   and exports all contacts to the path
‘==                   specified in the exportPath argument
‘==========================================================
sub exportToVCF(exportPath, ext)
    ‘======================================================
    ‘== declare the local variables
    ‘======================================================
    dim outApp, fldContacts, contactEntry, exp

    ‘======================================================
    ‘== create the outlook object and then get the contacts
    ‘======================================================
    set outApp = createobject("Outlook.Application")
    set fldContacts = outApp.getnamespace("MAPI").getdefaultfolder(10)

    ‘======================================================
    ‘== here we are looping the entries in the contacts
    ‘== folder looking for contacts – when a contact is
    ‘== found it will be exported
    ‘======================================================
    for each contactEntry in fldContacts.items
       if typename(contactEntry) = "ContactItem" then

          dim tmpString, tmpArr, periodLocation, outPath

          tmpString = contactEntry.lastnameandfirstname
          ‘================================================
          ‘== creating the name of the vcf file based on
          ‘== the first and last name fields of the contact
          ‘================================================
          tmpString = replace( tmpString, "’", "" )

          tmpArr = split( tmpString, "," )

          if ubound( tmpArr ) <> 1 then
             wscript.echo tmpString & ext
             outPath = exportPath & "" & tmpString & ext
          else
             if tmpArr(0) = "com" then
                wscript.echo trim(tmpArr(1)) & trim(tmpArr(0)) & ext
                outPath = exportPath & "" & trim(tmpArr(1)) & trim(tmpArr(0)) & ext
             else
                wscript.echo trim(tmpArr(1)) & " " & trim(tmpArr(0)) & ext
                outPath = exportPath & "" & trim(tmpArr(1)) & " " & trim(tmpArr(0)) & ext
             end if
          end if
          contactEntry.saveas outPath, 6

       end if
    next
    ‘======================================================
    ‘== dumping the object references that were created
    ‘======================================================
    set fldContacts = nothing
    set outApp = nothing

end sub

Set Hardware Acceleration Level

Ik vond een mooi script op het Edugeek. Het zet automatisch Hardware Acceleration Level op full.

Const HKEY_LOCAL_MACHINE = &H80000002
sComputer = "."
sMethod = "GetStringValue"
hTree = HKEY_LOCAL_MACHINE
sKey = "HARDWAREDEVICEMAPVIDEO"
sValue = "DeviceVideo0"
Set oRegistry = GetObject("winmgmts:{impersonationLevel=impersonate}//" & sComputer & "/root/default:StdRegProv")
Set oMethod = oRegistry.Methods_(sMethod)
Set oInParam = oMethod.inParameters.SpawnInstance_()
oInParam.hDefKey = hTree
oInParam.sSubKeyName = sKey
oInParam.sValueName = sValue
Set oOutParam = oRegistry.ExecMethod_(sMethod, oInParam)
strParse = oOutParam.Properties_("sValue")
sMethod = "SetDWordValue"
hTree = HKEY_LOCAL_MACHINE
sKey = Replace(strParse, "RegistryMachine", "")
sValueName = "Acceleration.Level"
‘* In Windows XP Change the uValue value for Accelleration.Level from 0 (FULL) to 5 (none)
uValue = 1
Set oRegistry = GetObject("winmgmts:{impersonationLevel=impersonate}//" & sComputer & "/root/default:StdRegProv")
Set oMethod = oRegistry.Methods_(sMethod)
Set oInParam = oMethod.inParameters.SpawnInstance_()
oInParam.hDefKey = hTree
oInParam.sSubKeyName = sKey
oInParam.sValueName = sValueName
oInParam.uValue = uValue
Set oOutParam = oRegistry.ExecMethod_(sMethod, oInParam)
sComputer = Empty
sMethod = Empty
hTree = Empty
sKey = Empty
sValue = Empty
sValueName = Empty
uValue = Empty
Set oRegistry = Nothing
Set oMethod = Nothing
Set oInParam = Nothing
Set oOutParam = Nothing
WScript.Quit

Sla het bovengenoemde script op als een vbs.
Je kunt dit ideaal gebruiken tijdens het deployen van virtuele machines via MDT in combinatie met automatische uitrol van VMware Tools. Nu hoef je zelf niet meer de Hardware Acceleration level aan te passen. Ik heb het getest onder XP & Windows 2003.

Outlook 2007 Anywhere Exchange 2007

1. Klik in het menu Extra op Accountinstellingen, selecteer het Exchange-account en klik vervolgens op Wijzigen.

2. Klik op Meer instellingen en klik vervolgens op het tabblad Verbinding.

3. Schakel onder Outlook Anywhere het selectievakje Via HTTP verbinding maken met Microsoft Exchange in.

clip_image002

Opmerking: Als de sectie Outlook Anywhere niet beschikbaar is, is Windows XP Service Pack 2 of hoger vermoedelijk niet op de computer geïnstalleerd.

4. Als u een proxyserver wilt opgeven, klikt u op Proxy-instellingen van Exchange.

clip_image004

1 Voer bij url in je domein naam in waarmee je vanaf buiten kunt connecten naar de exchange server.

2.  Als je een SSL verbinding wilt gebruiken vinkje aan Alleen verbinden via SSL in.

5. Klik onder Instellingen voor proxyverificatie op Basisverificatie of NTLM-verificatie, NTLM-Verificatie wordt standaard gebruikt die uitleg hieronder.

clip_image006

Opmerking: Bij het gebruik van Basisverificatie wordt het wachtwoord in de vorm van leesbare tekst verzonden. Voor de beste beveiliging wordt geadviseerd de opties NTLM-verificatie en Alleen verbinden via SSL in te schakelen.

Windows Deployment Toolkit 2008 (MDT) testen VMWare Workstation

Maak een Virtuele Machine aan OS Windows XP.
Zorg dat deze een Disk heeft van 10GB en 512MB geheugen lager als 512MB dan werkt MDT niet.
Voeg in de VMX file de volgende regel toe dan heb geen vmware drivers nodig
ethernet0.VirtualDev = “e1000”
Start de VM en boot van netwerk met PXE en druk dan twee keer op F12.

clip_image002
clip_image004

clip_image006

Voor nu laat ik het hierbij. Er komt nog een vervolg hier op met de deployen van Windows SP3 op de meest makkelijk en ideale manier.

VMDK Recovery Tool (ESX 3.5 Update 3)

Bedoeling:

Een block lijst van alle VMDK bestanden. De block lijst is een tekst bestand waarin bijgehouden wordt waar alle VMDK’s staan van de virtuele machine.

Je kunt VMDK’s mee terug halen als ze zijn verwijderd of de VMFS data opslag is verwijderd of is corrupt geraakt.

Limieten aan dit programma:

De VMDK  Recovery Tool is een programma wat is uitgebracht in ESX 3.5 update 3 als experimentele.

Experimenteel betekent dat het nog niet support wordt door VMWare en dat het nog niet in alle omgevingen zal gaan werken.

Het programma is niet beschikbaar voor ESXi.

Je kunt niet VMDK’s terug halen van verschillende block lijsten.

http://kb.vmware.com/selfservice/microsites/search.do?language=en_US&cmd=displayKC&externalId=1007243

Beschrijving van de Windows Server 2008 read-only domain controller compatibility pack voor Windows Server 2003 en voor Windows XP

Deze update oplost sommige problemen die optreden met clients die functies van Windows Server 2008 RODC niet ondersteunen.

http://support.microsoft.com/?id=944043

Translate »